Friday 27 May 2011

Exercise: Fitting the frame to the subject

Moving on from the last group of exercises we now are looking at the the frame of the viewfinder, the purpose of these exercises are to train the eye to see and compose pictures by using the frame .
For the first of these a subject that was clear in appearance and compact in shape had to be chosen, then a series of pictures taken, the first from a conventional viewpoint, the second had to fit the frame as tightly as possible, the third had to be right up close so that just a part of the subject was captured, for the fourth a more distant viewpoint had to be chosen and an attempt to compose a picture that stressed the surroundings.


Picture 1: Conventional viewpoint


 Picture 2: Attempt to tightly frame subject


 Picture 3: Closed in on part of the subject


 Picture 4: Composed scene that stresses surroundings


Once again a visit to the local 'tourist' railway, many more of these visits and I will earn the reputation as a train spotter!!.
I think in comparison my pictures do have similarities with the ones given in the exercise. I think that the second shot would have benefited from a tighter fit, a bit of careful cropping would rectify this. With the third picture I tried to emphasise the levers inside the signal box to try demonstrate the subject when only part of it is visible. On the last picture I tried to create a picture that demonstrated the surroundings, so I introduced the track and the old train carriage into the scene. I have tried various 'crops' of the final scene and have found a couple that work.

Wednesday 25 May 2011

Exercise: Panning with different shutter speeds

Once again a scene with movement had to be chosen, for this excersise the movement had to be followed with the camera (panning) to try and capture the subject sharply whilst streaking the background to give a sense of movement. A series of photographs were taken with the shutter speed decreasing for each shot.
After trying unsuccesfully to photograph cars at speed I decided to change tactics and get my wife to ride her bike past me, panning is not something I had done before and I was surpised and pleased with the results.

Photograph1  1/1000  f5.6
The subject and background are sharply frozen


Photograph 2  1/500  F8
The subject and background are still sharply frozen


Photograph 3  1/250  F13
The background focus is not as sharp, signs of movement are appearing with the faster moving parts of the subject.


Photograph 4  1/125  f18
More background blur, more movement to the wheels and feet.


Photograph 5  1/60  F25
Background is blurred, more movement .


Photograph 6  1/30  F29
As 5


Photograph 7  1/15  F29
Subject has now taken on appearence of momentum, background streaked.


Photograph 8  1/6  F29
Struggling to keep subject in focus, lots of streaking


Photograph 9  0.6  F29
Shot shows distance travelled in 0.6 of a second


Another enjoyable exercise and something I will be practising again soon. Again I had trouble with over exposure at the slow shutter speeds, probably need to get a filter to help with this.
Of all of the pictures I like number 7 the best, I like the way that the subjects movement is enhanced and appears to have been 'lifted' from the background, and the way the background streaking adds to the 'speed' effect.


Thursday 19 May 2011

Excercise: Shutter speeds

This exercise demonstrates how movement and shutter speed are related, the longer the shutter is open, the more movement will be captured.
A series of pictures from a fixed point were taken, from a very fast shutter speed to a slow one.
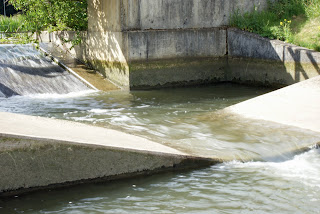
For this exercise I decided to photograph water movement, not something that I have done before but looking forward to the challenge. First problem was to find some fast moving water in Northampton not easy as the River Nene tends to meander gently through the county!!, eventually I found a weir and sluice feeding in to a local canoe club and decided it was about as good as it would get.
I have included five photographs from a set of 12 taken to show the results

  Photograph 1  1/1000  F5.6
  The very fast shutter speed has frozen the water movement.


Photograph 2  1/125  F11
At 1/125 there is a movement effect in some areas of the photograph, faster moving parts of the water are blurring.


Photograph 3  1/30  Ff18
At 1/30 the slower shutter speed is beginning to take more effect, all of the moving parts of the scene are flowing.


Photograph 4  1/6 F32
At 1/6 the water is changing appearance, larger areas of blurring are appearing and the effect of movement is apparent.


Photograph 5  1sec  F36
At 1 second the water flow now looks softer and flow is accentuated. Exposure is difficult to control.


This has been an enjoyable exercise, as I mentioned above I decided to go with water movement as I had not tried it before and I am  pleased with the results. Of the 5 shots my favourites are 4 and 5, I like the effect of blurring the water to make it look soft and slightly ethereal, it seems to enhance a less then dramatic scene.
I encountered a few problems with over exposure with the really slow speeds, even with a -2 exposure compensation set on my camera the picture was over exposed, I was shooting in shutter priority mode and the Fstop was at 36 so I knew I could not compensate for this with a change in aperture, this is something I intend to explore and overcome.


Wednesday 11 May 2011

Exersise:Focus at different apertures

For this exersise I had to choose a similar scene to the previous exersise and take a series of photographs from a fixed point, the focus point had to remain the same for all of the pictures and be near the middle of the scene. The first had to taken with the lens at its widest, the second stopped down to its mid point and the third at its smallest aperture.
The purpose of this exersise is to demonstrate the relationship of depth of field and aperture, the smaller the aperture the greater the depth of field.

Photograph 1  F5.6


Photograph 2 F14


Photograph 3  F32

Summary

Again I have gained a lot from this exercise, I did encounter a few problems initially with this task mainly due to my depth of field coming to far into the foreground even at F5.6, I overcame this eventually by focusing on a point deeper into the scene, I have experimented with many different types of scene with this exercise and have found it easier to control depth of field within smaller scenes. I have also learned that I need to get a better printer/scanner as mine is rubbish!!


Wednesday 4 May 2011

Exercise: Focus with a set aperture


The purpose of this exercise is to demonstrate how aperture and depth of field can be used to direct visual attention to a subject or certain area within a scene.
A scene with depth had to be chosen and three photographs at different points within the scene taken, the aperture of the camera had to be set as wide open as possible to create a shallow depth of field.

Series 1

Photograph 1   F5.6  1/800  ISO200


Photograph 2  F5.6   1/1000  ISO200


Photograph 3  F5.6  1/1000  ISO 200

Series 2


Photograph 1  F5.6  1/1000  ISO200

Photograph 2  F5.6  1/800  ISO200

Photograph 3  F5.6  1/800  ISO200

Conclusion

With the first set of photographs I prefer the first image, I think that the scene is more continuous with the focus to the front of the the image, giving it a sense of movement away and down the track. I don't think that this scene demonstrates the exercise all that well as it does not highlight any specific objects but I do like the results so decided to leave them in and include another set of photographs.
Of the second set of images again I prefer the first one, I like the way that the scene is blurred in the background drawing attention to the platform number that is in focus.
I have enjoyed this exercise and I feel that I am getting to 'know' my camera better. Looking forward to the next one!!